Labels

Showing posts with label Hair and Beauty. Show all posts

11.01.2012

Halloween


Halloween this year we went to a fancy dress party at Coco Tang cocktail bar, I decided to go as Black Swan. I got all my outfit from American Apparel so will be wearing that again! My favourite part about this outfit was the makeup. It took me quite a long time to do but looked good in the end!

2.28.2012

Chalk That Chalk.


I always want to change and be a little bit more experimental with my hair but sometimes a permenant colour isn't the best answer and can leave you walking around like a Muppet for several months. But since the one and only Lauren Conrad posted a picture of her with tie-dyed tips I  haven't wanted to try out this style myself but been far too nervous to UNTIL I found out she achieved this look by chalking her hair. Chalking is not a permanent solution for colouring your hair but will however give you the look you desire until the next time you wash your hair through.

To achieve this style of look you will need a pack of soft pastel chalk (NOT OIL BASED CHALK), spray bottle of water and a straightening iron. Twist the tips of your hair into small sections and rub the desired colour of chalk on to the middle to the tips of your hair. After chalking each individual section be sure to brush out any excess chalk that may be left on the hair. Us blonde girls do not need to use any water to achieve this look, however if you have red or dark hair wet the section of your hair before you chalk it or the colour may not show up. If blondes wet their hair the chalk will actually stain your hair and remain in for up to two weeks as a semi-permanent colour. Once you have chalked your hair a great way to really make the colour stick is running over it with a straightening iron to lock it in.


Once your hair is chalked remember that the colour will rub off so it is best to wear darker clothes that are less likely to be stained. When washing your hair after it has been chalked its best to brush it to try and get as much of it out as possible. Also it is best not to chalk your hair too often as some of the ingredients do dry out the natural oils in your hair so its best to use a deep conditioning treatment afterwards.

These are some of my favourite styles I have found on the web, enjoy!!!


Images Sourced From: www.thebeautydepartment.com, www.indiaroseblog.blogspot.com, www.weheartit.com, www.google.co.uk/images search Hair Chalking

2.27.2012

Birds of a Feather.


I  have been neglecting my blogging duties lately and decided that enough was enough and it was time for me to give myself a shake and break this vow of silence! So at long last here is a new post after a month of tumble weed...

Over Christmas time I got a feather hair extension put in my hair. I would recommend these to EVERYONE. They look best when put in a lower layer of your hair and in a colour that blends in so that every now and then the extension catches peoples eye, breaks up your hair and acts as an accessory. However you can achieve a much more dramatic look with bright coloured or several extensions in the hair. In  the Summer I would like to have a turquoise or orange one put in.

The extension I used is by a brand called Royal Feathers, http://www.royalfeathers.co.uk/. They cost around £20-£25 and should last for up to 6 months. The extension can be just treat the same as your normal hair and can be blow dried, straightened and curled making them relatively low maintenance. It is applied to the hair with two small metal clamps, pressed on to a bit of your own  hair which can easily be taken in and out at any time.

These are some of my favourite pictures I found on the Internet....


1.19.2012

Missoni Magic Manicure


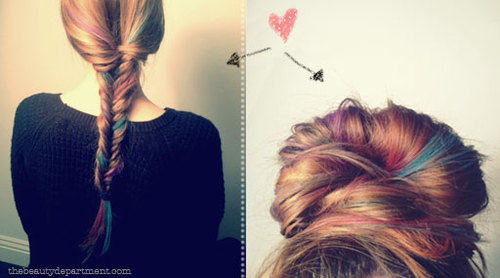
photos and post by Kristin Ess
If you combine our love of chevron patterns with our love of colour, you get Missoni. Since the famous Italian fashion house doesn’t make nail decals, we figured we’d give “Missoni Nails” a shot! While doing these nails, I discovered my new favourite nail decorating tool: THE GREASE PENCIL! The work so well for drawing on nail polish once it’s dry! It’s almost like a soft coloured pencil. I got them in black and white and then did the colours with paint and polish…
I USED:

Sourced from www.thebeautydepartment.com

1.18.2012

Just Like Heaven.

I don't know about the rest of you but this January I have actually started using my gym membership and I am already begining to see the results thank the lord! But on those days that I really don't want to go I just think of the Victoria Secret girls and how hot they look! They motivate me to get ready for bikini season, I will have a body like this for Ibiza!!!! I am sticking a picture on the fridge to stop me from reaching for the chocolate!

As beautiful as these girls look they do earn it! I read an article with their trainer in Grazia and leading up to the shows they are in the gym every day doing two hours of cardio and then weights and crunches on top of that! Their diet also becomes incredibly strict, 4 weeks before the show they are only allowed grilled chicken or fish and green vegetables, then the week of the show only fluids and then the day of the show nothing at all! But I was pleased to read they are human and as soon as the show is finished the proceed to stuff their faces with all their favourite foods!

Do you have someone who motivates you to get up and go? The pictures below are exactly what gets me on that tredmill and doing those ab crunches....


Images sourced from www.weheartit.com

1.16.2012

Lash Lust.


Eylure who have previously collaborated with such lash lusting lovelies such as Girls Aloud have recently announced they are collaborating with the feline eyed beauty Katy Perry.

Katy is never seen with out a face full of make up usually centred around her big blue eyes, so the collaboration makes perfect sense.


The lashes themselves can't actually be viewed at the moment a spokes person from Eylure has announced, 'As a false lash lover herself, Katy had a very clear idea of what she wanted to achieve and was involved in every step of the design process... 'We were keen to create a range of lashes that were a direct extension of her own personal style'. Katy is set design four different styles of lashes for the brand which will be available in stores from February.

These pictures below are exactly why I will be buying some...


12.30.2011

Heavy Metal.

Thinking about mixing it up for NYE and using some hardware in my hair. Usually we opt for hiding our grips when creating styles with our hair, but after seeing these images on www.thebeautydepatment.com I think I might try using my grips as an accessory rather than a necessity!


I have always been a fan of embellished clothing so lets see how the embellished hair goes down!

Chanel

Holly and the Ivy.

With today and tomorrow the last chance to really pull of your Christmassy style make up looks until next year why not try a green lid with red lips. This may sound horrible but it works really well if you pair a bold strong red with a light green lined lid. The look below was from Jil Sander's Fall 2011 shows.


This look just isn't for Christmas either as Dior used it in their Spring 2012 catwalk shows, just mixing up the tones used gives it a more summery and fresh feel.


Hold on to that festive feeling for the final few days!!!!!  

12.29.2011

Earring Etiquette.

Sometimes I find it a real struggle to decide how to wear my hair with certain types of earring so that it doesn't look like I have too much going on in the shoulder/face area!

Kate Bosworth is always accessorised well with beautiful hair when on the red carpet, giving her a Bo-ho chic air. So I had a little nose on her website www.jewelmint.com and found this post giving Kates top tips on how to style your hair to make the most of your earrings, I will be taking note to this when doing my hair for the big New Years Eve! 

12.22.2011

Colour Code.


I personally love the dip dye hair look but if you were wanting an alternate look and are feeling brave this style that I found in Vogue Taiwan is a great option!

Using the different colours really makes the hair style individual and it can be as bright or as subtle as you like by varying the colours used and the amount you put in your hair.
Despite my love for this look it might not be wearable on a daily basis especially in the office, therefore clip-in hair extensions would be fantastic for achieving this. You also would have to carefully consider the colours you chose as you don't want any outfit clashes or colours that are unflattering on your skin!

Think I may have to do so sometime soon...just first to chose the colour/colours!

12.21.2011

Festive Fingers.

After posting about festive finger nails last night I had a look on the web at some other ideas people had and I found this idea for a Christmas light style, a bit more difficult to do but a great alternate idea to the usual glittery, Santa or red nails we see!

I found this post on www.thebeautydepartment.com. Let me know what you think!


NAILED IT!


Photos + post design by Kristin Ess
While you’re all probably busy decking the halls right now, perhaps you’ll be able to take a break to get fancy, festive + fun with this manicure tutorial from Lady Conrad! She wanted to string some lights across her nails and so she did… Literally! Here’s how she created these lil’ cuties:
TOOLS: base & top coat, green polish & red polish (you can use any colours you want), white or off-white polish, cuticle nippers or small scissors, black cotton string, a small brush or pointed q-tip.
STEPS:
  1. On clean nails, do a solid coat (or two thin coats) of white or off white polish.
  2. After the white polish dries, do one clear coat. The string will adhere to this so make sure it’s not too fast drying or too thin of a coat.
  3. Drape black string over the nail and let it loop as you see Lauren doing in the photo. Cut the string about 1/2 inch longer on each side of the nail. Don’t trim it down yet.
  4. Add a thin clear coat on top of the string to secure.
  5. Once that dries, trim the string down using cuticle nippers or small pointy scissors.
  6. Next is the fun part– adding your lights. Pick any colours you want!
  7. Last, do one coat of a quick drying clear polish.